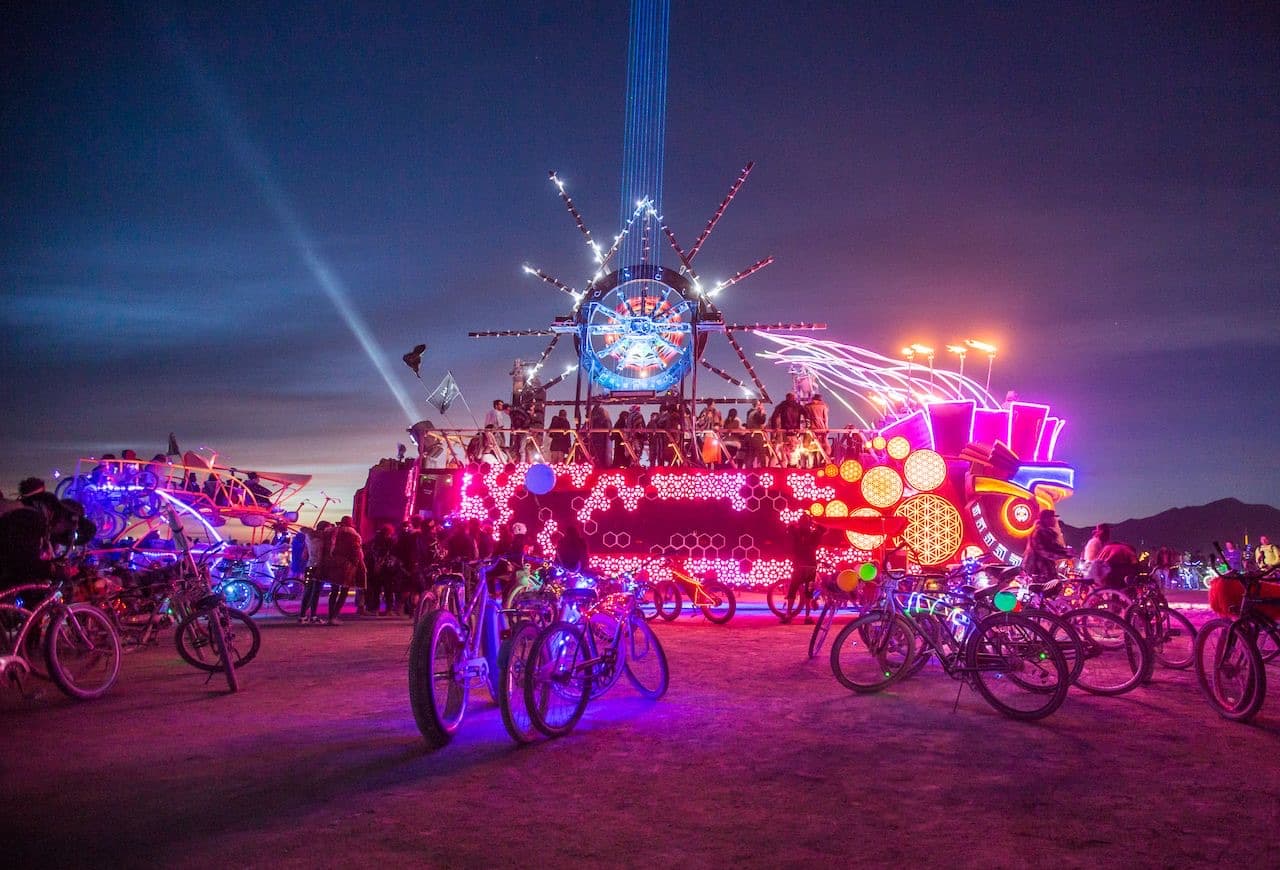
A row of bikes with lit wheel rings parked in front of a neon art car at night on the playa.

Do you need help getting your bike lit up?

An unlit bike is invisible to an art car, and every wheel kit sells out in August. This is the build we did, with the parts, the wiring, and the mistakes that cost us a day each.

Before you order

Copy the shopping list, or print the whole build

Copy the parts list or print the whole guide, then send either to whoever is building the other bike. 6 days to the gate. Order today and check the delivery date on every line: anything that is not two-day shipping arrives after you leave.

Wiring

How one controller reaches both faces of a wheel

Every wire from the controller runs through its own solder-seal splice, then splits into two legs: one for the strip on the outer face of the rim, one for the inner face. The whole harness travels along a single spoke, so nothing hangs loose while the wheel spins.

One wheel, hub to rimBATTERYrides the hubCONTROLLERone outputV+DATAGNDsolder-seal splice, one per wireSTRIP, OUTER FACESTRIP, INNER FACEalong one spokeEvery wheel is an island.Nothing crosses the axle: battery, controller and both strips spin together.

GlowKit · the Stokd bike lighting guide

The build, in full

Two ways to do it on the same strips and batteries. Pick one in the first section and read only that column.

Easy build, one bike
$423.90
Advanced build, one bike
$483.88
Whip add-on
$163.92

Amazon US prices read 2026-08-22. They move. Links are plain product links, not affiliate links.

Start here

Pick a path

Same strips, same batteries, same tape, same wheels. The only thing that changes between the two builds is the brain on each light and how you talk to it.

Path 0

Buy a wheel kit

Kits like VeloGlow ship a strip, a small pack and a remote per wheel. They are analog strips: one solid color at a time across the whole ring, and the remote changes the color, not the pattern. The kit pack runs 2.5 hours on white and about 7 on blue, and both the kit and its replacement battery were sold out when we looked in August 2026.

If you want a ring that is on and is a color, this is the least work. Everything below is for people who want more than that.
Path 1

Easy build

$423.90

one bike: frame + two wheels, both faces

  • One remote per bike. Zone keys along the bottom: 1 frame, 2 front, 3 rear, ALL.
  • 146 built-in patterns plus music mode, on each controller.
  • Phone over Bluetooth to one controller at a time. No WiFi anywhere.
  • Setup is minutes: bind each controller to a zone key, set the strip length in the app.
  • Build time, our estimate: a full day per bike for both wheels and the frame once the parts are on the table. The first wheel is the slow one.

Path 2

Advanced build

$483.88

one bike: frame + two wheels, both faces

  • WLED on every light: around 180 effects, 70+ palettes, segments, playlists, scenes you design yourself.
  • One app sees the whole bike. A pocket router in the frame bag makes the bike its own WiFi; your phone joins it and every controller appears.
  • A radio remote per bike flips all three lights into scene 1 to 4 from the saddle.
  • Setup is an evening with a laptop. Then it is the system you keep growing.
  • Build time, our estimate: the same full day per bike as the easy build, plus that evening. Eight days out, the parts have to arrive by day three.
Easy buildAdvanced build
BrainsBanlanX SP630E on every lightGLEDOPTO WLED boards on every light
Designs146 dynamic modes, 18 music, 18 custom. Pick from a list.Around 180 effects × palettes × segments. Compose your own and save them.
RemoteRB3 zone remote: pick a light or ALL, then color, mode, speed, brightnessRadio remote: ON, OFF, four scenes, night, brightness, for every light on the bike at once
PhoneBanlanX app over Bluetooth, one controller at a timeWLED app over the bike WiFi, all controllers on the bike at once
Needs internet?NeverOnce, at home, to update firmware and build scenes. Never on the playa.
Sync between lightsSame mode on each zone, set separatelyWLED sync groups: change one, the others follow
WhipIts own Nilight remoteIts own Nilight remote, or experiment: drive it from the frame board
Cost, one bike$423.90$483.88
Grows intoMore zones on the same remoteLedFx from a laptop, sound-reactive shows, custom presets, more bikes on the same app

Physics first

Three rules that shape every choice

Every part below is here because of one of these.

1

Every wheel is an island

A wheel turns. A wire from the frame to the rim winds around the axle on the first pedal stroke. So each wheel carries its own battery, its own controller and its own strips, all spinning together, and nothing crosses the axle. Slip rings exist and none of them survive playa dust on a bicycle hub.

2

One plug, one voltage

Everything runs at 12 V and every battery ends in a DC5521 barrel (5.5 mm outer, 2.1 mm inner, center positive). Same plug on the whip, the frame packs, the wheel packs and every charger. Any charger fits any pack; any pack runs any light. Never wire two packs together to feed one load.

3

Weight at the hub, light at the rim

Mass near the axle is barely felt; mass at the rim is a flywheel. So the battery and controller ride the hub, and only the strip goes on the rim, stuck flat on the sidewall with tape. Velcro peels under the spring-back of a bent strip; a foam tape bond plus a clear band over the top does not.

Glossary

Words you will meet

The words the parts lists use, each in one line.
WordMeaning
DC5521The round 12 V barrel plug on every battery and charger here: 5.5 mm outside, 2.1 mm inside, center positive.
12 V pack / 3SThree lithium cells in series, 12.6 V full and about 9 V empty. Every light here runs straight off one.
BMSThe board inside a pack that stops it over-charging, over-draining or shorting. Every pack on this page has one.
Addressable / WS2811A strip with a tiny chip every few centimeters. Three wires: 12 V, DATA, GND. The controller tells each chip what color to be, which is what makes patterns possible.
Analog RGBFour wires: 12 V and a red, green and blue return. The whole strip is one color at a time. VeloGlow-style kits are this.
FCOBFlexible chip-on-board: hundreds of tiny LEDs per meter under a phosphor bar, so the light is a continuous glow with no visible dots.
IP30 / IP66 / IP67How sealed a thing is. IP30 is bare, IP66 keeps dust and hose water out, IP67 survives a dunk. Bare on the rim under clear tape; sealed on the frame.
WLEDFree firmware for ESP32 boards. Around 180 effects, a web page on the board, a phone app, a radio remote, and it needs no internet to run.
ZoneOn the RB3 remote, a number a controller answers to. Press 2, and only the light bound to 2 changes.
Scene / presetA saved look: effect, colors, speed, brightness. In WLED, scenes 1 to 4 map to the remote keys S1 to S4.
VHB3M acrylic foam tape. Permanent, made for metal, and it absorbs vibration instead of cracking.
ESP32The small WiFi and Bluetooth chip inside every WLED controller here. It runs the effects; the phone only changes them.
ESP-NOWA radio mode built into that chip that lets the remote talk to the boards with no network at all. It only works on WiFi channel 1.
GPIO16, GPIO4Two output pins on the frame board. Left strip on one, right strip on the other.
LedFxFree software for a laptop that drives every WLED board on the network with sound-reactive shows. The growth path, not a day-one need.

Part one

The whip

The tall light that makes you findable from across the playa. It comes as a complete system with its own remote; you add a mount, a battery and one pigtail.
Whip
What it is
A 3 ft flexible polycarbonate rod wrapped in a spiral of LEDs, lit all the way round, on a quick-release base that drops into a 12 mm hole. IP67. In the box: the whip, a 3-pin lead, a 2-way splitter, a rocker switch and a small RF remote.
What it does here
The tall light that makes you visible across the playa. Twelve solid colors and dozens of chasing patterns from its own remote.
How it connects
Its 3-pin plug goes into the Nilight control box. The box leads go to the rocker switch, and the switch to a 12 V battery through a DC5521 pigtail. Red to red, black to black.
Why this one
The standard off-road whip: sealed, quick-release, and its remote can be locked to this whip only so a neighbor cannot change it.
Whip
What it is
A machined clamp that grips a round tube between 22.2 and 28.6 mm and presents a 12 mm hole.
What it does here
Holds the whip base to the bike. The whip drops into the hole and locks.
How it connects
Clamp around the rack tube, two screws, blue threadlocker. Whip base into the hole.
Why this one
UTV whip mounts start at 38 mm tube and cannot fit a bicycle. This class does. Measure the tube first: 70 to 90 mm of string around it and it fits.

The whip runs off the same TalentCell battery and the same DC5521 pigtail as the frame. Both are in the frame parts below; buy one extra battery for the whip and the pigtail pack covers it.

The chain, plug to light

TalentCell socket → DC5521 pigtail → rocker switch → Nilight control box → whip. Red to red, black to black at the one bare-wire joint (pigtail to switch). Everything else in the box is keyed plugs. The battery lives in a frame bag or a small dry bag; the control box sits beside it; the switch goes where a gloved thumb can find it.

Build

  1. 1
    Measure the tube. Wrap a string round the rear rack tube where the mount will clamp. 70 to 90 mm of string is a fit for the KEMIMOTO (22.2 to 28.6 mm tube). Outside that, look for a mount in the right class; UTV mounts start at 38 mm and will not close on a bicycle.
  2. 2
    Clamp the mount with a drop of blue threadlocker on both screws. Whip base into the 12 mm hole until it clicks. Pull up on it: it should not.
  3. 3
    Wire the chain as above. Cut the pigtail wires to length, strip 6 mm, and join them to the rocker switch leads with solder-seal connectors so the joint is sealed.
  4. 4
    Strain-relieve every cable to the rack with zip ties, with a finger of slack at each plug. Cables that can swing will unplug themselves on washboard.
  5. 5
    Lock the remote to this whip. The Nilight card in the box gives the key sequence for one-to-one pairing. Do it at home. Skip it and a neighbor with the same whip changes yours every time they change theirs.
  6. 6
    Runtime: a 142 Wh pack is far more than a 3 ft whip draws in a night. Charge it every second day and forget about it.

Part two

The frame

One reel of sealed continuous-glow strip, cut in half, one length down each side of the frame, with the battery and the controller in a bag on the frame.

Parts

Shared parts first, then the controller for each build. Buy one controller family, not both.

Both builds
What it is
A 12 V lithium pack in a hard case, about 6.3 x 3.2 x 1.9 in, with a DC5521 socket, a 5 V USB port and a charge gauge.
What it does here
Powers a whole frame for the night, or a whip. Its USB port also powers the pocket router on the advanced build.
How it connects
A DC5521 pigtail from its socket to the frame controller, or through the rocker switch to the whip.
Why this one
A 5 m frame strip can draw 40 W at full white; this pack gives that 3.5 hours and ordinary color use 10 hours or more.
Both builds
What it is
A DC5521 plug on one end, bare red and black wires on the other, about 30 cm long. Five in the pack.
What it does here
Bridges a battery that ends in a socket to anything that takes bare wire: the frame controller on either build, and the whip rocker switch.
How it connects
Plug into the TalentCell. Red wire to V+, black to V-.
Why this one
One pack covers two frames and a whip with two spare. Each TalentCell also ships a plug-to-plug cable; cut one end off and you have the same thing.
Both builds
What it is
Five meters of continuous-glow LED tape, 10 mm wide, in a silicone jacket that keeps dust out. A control chip every 62.5 mm makes it addressable. Runs on 12 V.
What it does here
The outline of the frame. One reel per bike, cut in half: one length down the left side, one down the right.
How it connects
Three wires from the controller to the start of each strip: 12 V, DATA, GND. Corners and hops over the e-bike battery use the clip connectors.
Why this one
Continuous light with no visible dots, sealed against dust, and it runs straight off the 12 V battery with no converter.
Both builds
What it is
Clip-on connectors for 10 mm three-pin strip: L-shaped corners, straight joins, jumper cables and strip-to-wire leads. Choose the 10 mm variant. Kit 3 is mostly corners; Kit 1 adds jumpers.
What it does here
Turns a straight roll into a frame outline. Corners go round tubes, jumpers hop over the e-bike battery, strip-to-wire leads reach the controller.
How it connects
Open the clip, slide the strip end in at a cut mark with the silicone trimmed back so the teeth bite copper, close it.
Why this one
No soldering. They are single use, so buy two kits for two bikes and you have spares for the clip that seats wrong.
Advanced build
What it is
An ESP32 controller running WLED, with four outputs, Wago lever ports, a level shifter for clean data, a built-in mic and a 15 A fuse. 108 x 45 x 18 mm.
What it does here
The frame brain on the advanced build. Two outputs drive the two sides; two stay spare.
How it connects
TalentCell through a DC5521 pigtail into the V+ / V- Wagos. Each side strip onto GPIO16 and GPIO4 with V+ and GND.
Why this one
This is the controller with the designs: around 180 effects, 70+ palettes, segments, playlists, sound reaction, a full web page on the board.
Advanced build
What it is
A 39 g pocket WiFi router, 2.4 GHz, powered from any USB port, running OpenWrt. It plugs into nothing but power: no cable, no SIM, no internet.
What it does here
Makes the bike its own WiFi network, so the WLED app on your phone sees every controller on that bike at once.
How it connects
USB cable from the TalentCell 5 V port, in the frame bag. Set to channel 1 once, at home.
Why this one
Without it the WLED app sees one controller at a time. With one on each bike, every bike is complete on its own wherever it rides.
Easy build
What it is
The SP630E: a 78 x 56 x 20 mm controller with a DC jack, screw terminals, Bluetooth, a built-in microphone and an on/off button. Plus the RB3 remote: on/off, color wheel, brightness slider, mode and speed keys, music, and zone keys 1 2 3 4 ALL along the bottom.
What it does here
On the easy build the kit controller runs the frame and the remote runs the whole bike: pick a zone, change it, or ALL.
How it connects
TalentCell to the DC jack with a DC5521 lead. VCC / DAT / GND to the frame strip. The remote needs nothing: radio straight to the controllers it is bound to.
Why this one
The only controller family with a handheld remote that can address one strip out of a group, and it runs the same WS2811 strips. 146 dynamic modes, 18 music, 18 custom.

Wiring

JointAdvanced build (GLEDOPTO 4-ch)Easy build (SP630E)
Battery inDC5521 pigtail from the TalentCell: red into the V+ Wago, black into V-.DC5521 lead from the TalentCell straight into the DC jack. The TalentCell ships one.
Left stripStrip-to-wire lead from the connector kit: V+ to V+, DATA to GPIO16, GND to GND.VCC / DAT / GND screw terminals to the strip lead.
Right stripSame, DATA to GPIO4. Two independent outputs, so left and right can be different segments.Join both strip leads in parallel into the same three terminals. One output, same pattern both sides.
CornersL-connectors from the kit at each tube joint; a jumper cable hops the e-bike battery.Same.
Strip directionEach strip has an arrow. DATA goes in at the arrow tail. Feed the wrong end and nothing lights.Same.

Build

  1. 1
    Cut the reel in half on a cut mark. The marks are every 62.5 mm; a cut anywhere else kills that segment. You now have two 2.5 m strips.
  2. 2
    Dry-fit the outline with masking tape: down tube, top tube, seat stays, whatever shape you want, one side at a time. Note each corner and each hop.
  3. 3
    Trim the silicone back 10 mm at each cut end so the clip teeth bite copper, slide the end into a connector at a cut mark, close the clip. Check the three pads line up with the three pins; the middle pin is DATA.
  4. 4
    Bench test on the battery before sticking anything. Power the controller, pick any effect, and watch both strips run end to end. A dead stretch means a connector seated wrong.
  5. 5
    Clean the tubes with isopropyl, peel the 3M backing a hand at a time, press as you go. Add a wrap of clear tape at each corner and each end; the backing alone lets go in heat.
  6. 6
    Bag the brain. Controller and TalentCell in the frame bag, pigtail plugged in, output leads out through the zip. On the advanced build the pocket router goes in the same bag on the TalentCell USB port.
Frame runtime on one 142 Wh TalentCellHours
Full white, both sides, 100% brightness (40 W)3.5
One color, typical effect10+
Blue or green only15+

Part three

The wheels

The part that sells out every August and the part that looks best. A ring of continuous light on both faces of each rim, each wheel carrying its own battery and brain on the hub.

Measure the rim before you buy anything

The strip is 10 mm wide and needs a flat band on the outer sidewall of the rim, between the tire bead and where the spokes start. Measure that band, not the wall thickness and not the internal width. A fat-bike rim has about half an inch here, which is 12.7 mm: enough, with a little margin.

Also measure round the rim where the strip will sit. A 26 × 4 fat-bike rim is about 2.1 to 2.3 m around. One 5 m reel cuts into two lengths for one wheel, both faces.

Rim cross-section, viewed from the front of the biketirerimLED strip, 10 mmMEASURE THISflat band on theouter sidewall,tire down to spokesnot wall thicknessnot internal rim widthspokes

Parts per wheel

Multiply by the number of wheels. The wheel controller is the only part that changes between builds.

Both builds
What it is
Nine 18650 lithium cells in a heat-shrink sleeve, about 75 x 53 x 71 mm, 500 g, BMS inside, 120 Wh. Two leads: a DC5521 socket for charging and bare red and black wires for the load. In the box: a 12.6 V 2 A charger, a lever-clip wire joiner and a DC5521 extension.
What it does here
Powers one wheel, both faces, for a night of color: about 10 hours of blue or green, 3.5 of white.
How it connects
Red wire to the wheel controller positive input, black to negative. Charge through the socket lead with the included brick.
Why this one
Both faces of a wheel draw twice what one does; a 5.8 Ah pack gives about 6 hours of color. This one gives a full night and charges in 5 hours at 2 A. No hard case, so it gets rolled in inner tube before any zip tie.
Both builds
What it is
The same continuous-glow addressable tape as the frame, without the silicone jacket: 10 mm wide, about 2 mm thick, more flexible. One reel cuts into two wheel lengths.
What it does here
The ring of light on each face of each rim. One reel per wheel.
How it connects
VCC, DATA and GND from the wheel controller soldered to the start of both strips, in parallel. Stuck to the rim on VHB, then sealed under clear tape.
Why this one
The sealed version is thicker and stiffer, and a strip bent flat around a rim fights stiffness. The clear tape over the top seals this one anyway.
Advanced build
What it is
A 42 x 38 x 17 mm, 20 g WLED controller: one output, 6 A, DC 5 to 24 V, V+ / V- quick-connect input.
What it does here
One per wheel on the advanced build, riding the hub beside the battery. Runs both faces of that wheel from its one output.
How it connects
Battery red wire into V+, black into V-. V+ / DATA / GND out to both rim strips through solder-seal joints.
Why this one
Same firmware and app as the frame board, so every scene and sync setting carries across. The big 4-channel board would also run a wheel, but it is 108 mm long and does not fit on a 1 in front hub; this one is 42 mm and does.
Both builds
What it is
A 10 mm wide clear double-sided acrylic foam tape.
What it does here
The bond between rim and strip.
How it connects
Isopropyl on the rim, let it flash off, lay the VHB, then the strip onto it, pressing as you go round.
Why this one
Exactly the strip width, made for metal, and the foam soaks up vibration and spring-back. One roll per wheel.
Both builds
What it is
A wide clear weatherproof tape, UV rated.
What it does here
The seatbelt over each rim strip: it traps the strip under a band stuck to bare rim on both sides, and seals the unjacketed strip against dust.
How it connects
Cut into 15 mm ribbons with a straightedge. One ribbon over each strip for the full circumference, overlapping the ends.
Why this one
An adhesive bond lets go on a hot afternoon; a band over the top is still holding when it does. One roll does two wheels.
Both builds
What it is
Heat-shrink butt connectors with a ring of solder inside. Slide the wires in, heat with a lighter, and they solder and seal in one step.
What it does here
Every joint on the wheels: controller to strip, and the three-way splits where one output feeds both faces of the rim.
How it connects
Strip 6 mm of insulation, push the wires in from each end, heat until the solder ring melts and the sleeve shrinks.
Why this one
No soldering iron on a spinning hub, and each joint comes out sealed against dust.
Both builds
What it is
Sixty feet of flexible stranded wire in six colors, with heat-shrink included.
What it does here
The short runs on each wheel: controller to each face of the rim, and the hop through the spokes from one face to the other. Red for V+, black for GND, white for data.
How it connects
Cut to length, strip, into a solder-seal connector at each end.
Why this one
Silicone insulation stays flexible in cold and does not crack under vibration. Three colors mean no guessing at a joint.
Both builds
What it is
Soft silicone plugs that push into a DC power socket.
What it does here
Cap the charging socket on each wheel battery whenever a charger is not in it.
How it connects
Push in. Pull out to charge.
Why this one
The wheel socket is the only exposed port on the bike, on the dustiest part of it. Fifty caps for ten dollars.
Easy build
What it is
The same controller as in the RB3 kit, without a remote. 78 x 56 x 20 mm, DC jack in, VCC / DAT / GND out, built-in mic, Bluetooth.
What it does here
One per wheel on the easy build. Binds to that bike RB3 remote as zone 2 (front) or zone 3 (rear).
How it connects
Battery red wire to VCC, black to GND. VCC / DAT / GND to both rim strips.
Why this one
Same family as the frame controller, so one remote covers frame and wheels.

Why both faces, and what it costs

A bike is seen from the side. Light one face of the rim and half the people who look at you see a dark wheel. So each wheel gets two strips, one per face, wired in parallel from the one controller output so they show the same pattern. Two strips draw twice the power, which is why the wheel pack is a 10 Ah brick and not the 3.4 Ah cell in a kit.

Wheel runtime on one 120 Wh pack, both facesHours
Full white, 100% brightness (about 37 W)3
One color, typical effect9 to 10
Blue or green only12+

Build, one wheel

  1. 1
    Cut two strips to the rim circumference, each on a 62.5 mm cut mark, a few centimeters short so the ends do not meet over the valve.
  2. 2
    Make the wiring harness on the bench. From the controller output, one red, one white, one black wire to a three-way solder-seal join each, then two legs per wire: one to each strip start. Leave the legs long enough to reach the rim from the hub along a spoke, plus a hand of slack.
  3. 3
    Bench test with the wheel pack, not a bench supply. Both strips lit end to end, the color order right (set it in the app until red is red), and the brightness limit set so a full-white scene cannot brown-out the pack.
  4. 4
    Clean the sidewall band with isopropyl all the way round and let it flash off. Dust on the rim is the difference between a bond and a peel.
  5. 5
    Lay the VHB round the band, starting and ending at the valve, pressing it down with a thumb. Peel the top liner a hand at a time and lay the strip onto it, LEDs facing out, pressing as you go. The strip bends in its flat plane here, which it does not like; the foam takes up the fight.
  6. 6
    Seatbelt it. Cut the clear Gorilla tape into 15 mm ribbons against a straightedge. Lay one ribbon over the strip for the full circumference, overlapping the ends by a hand, so it grips bare rim on both sides of the strip. This seals the bare strip and holds it if the VHB ever lets go.
  7. 7
    Repeat on the other face. Pass the second strip leads through the spokes near the hub, not at the rim, so the wire crosses where it is shortest and stillest.
  8. 8
    Dress the hub. Wrap the pack in a cut section of old inner tube (friction, and the pack has no hard case). On the rear hub (4 in wide) it sits on the hub body with two zip ties round the hub and two to the spokes. On the front hub (1 in wide) the pack stands against the hub with the spokes either side, zip-tied to the spokes at four points, controller on the opposite side for balance.
  9. 9
    Mind the rotor. Everything on a disc-brake wheel lives on the side away from the rotor, or clears the caliper by a finger at every point of the rotation. Spin the wheel slowly by hand with the bike lifted and watch the whole revolution.
  10. 10
    Strain-relieve the harness to a spoke every 10 cm, and cap the charging socket with a silicone cap. Spin test at walking pace, then a short ride, then re-check every zip tie.

Part four

How you control it, with no data

Phones at Burning Man have WiFi and Bluetooth radios and no internet. Both builds use exactly that. Nothing here needs a signal.

Easy build

ONE BIKEevery light carries its own battery and brain; the whip is optionalFRAMETalentCell 142 WhbatterySP630E + RB3Bluetooth + radioZ1left + right stripsIP66 FCOBFRONT WHEELturns with the wheelQwenoer 10 AhbatterySP630EBluetooth + radioZ22 strips, both facesIP30 FCOB + tapeREAR WHEELturns with the wheelQwenoer 10 AhbatterySP630EBluetooth + radioZ32 strips, both facesIP30 FCOB + tapeWHIPoptionalTalentCell 142 WhbatteryNilight boxown controllerN3 ft spiral whipIP67ZZone key on the RB3 remote: 1 frame, 2 front, 3 rear, ALL = the whole bike.NNilight RF remote: the whip only.Phone talks Bluetooth to one controller at a time through the BanlanX app.No WiFi anywhere. Dashed = spins with the wheel. Nothing crosses an axle.

The remote is the main control. The RB3 has zone keys 1 2 3 4 ALL along the bottom. Each controller on the bike is bound to one key: frame 1, front 2, rear 3. Press 2, then a color or a mode key, and only the front wheel changes. Press ALL and the whole bike changes together. Radio, 20 m or so, no pairing to a phone.

The phone is for detail. The BanlanX app connects over Bluetooth to one controller at a time: set the strip length, the color order, build custom modes, and name each controller so Bike 1 Front is not a mystery in the list.

Advanced build

ONE BIKEevery light carries its own battery and brain; the whip is optionalFRAMETalentCell 142 WhbatteryGLEDOPTO 4-chWLEDRleft + right stripsIP66 FCOBFRONT WHEELturns with the wheelQwenoer 10 AhbatteryGLEDOPTO MiniWLEDR2 strips, both facesIP30 FCOB + tapeREAR WHEELturns with the wheelQwenoer 10 AhbatteryGLEDOPTO MiniWLEDR2 strips, both facesIP30 FCOB + tapeWHIPoptionalTalentCell 142 WhbatteryNilight boxown controllerN3 ft spiral whipIP67NETWORKTalentCell USB5 V portGL.iNet Mangorouter, channel 1the bike WiFiphone, laptop, its 3RPaired to the bike radio remote: S1 to S4 change all three together.NNilight RF remote: the whip only.Phone and laptop join the bike WiFi and see its three controllers in the WLED app.No data, no internet. Dashed = spins with the wheel. Nothing crosses an axle.

The phone is the main control. The pocket router in the frame bag broadcasts a WiFi network, say Bike1Net, and all three controllers join it at home. On the playa your phone joins Bike1Net, opens the WLED app, and all three lights are there: pick an effect, a palette, a speed, per light or synced.

The remote is for riding. S1 to S4 on the radio remote put every light on the bike into scene 1 to 4 at once, gloves on. It talks straight to the boards over ESP-NOW, the radio built into every ESP32, with no network in between, so it works whether or not the router is on.

The laptop is for designing. Join Bike1Net at camp and open each board in a browser for the full editor. With LedFx installed, the laptop can also run sound-reactive shows across every light on the network.

Plain languageWiFiInternetBluetooth
What it isA radio that lets two devices near each other talkThe world, reached through someone else’s WiFi or a cell towerA shorter-range radio for one device to one device
Needed on the playa?Advanced build: yes, the bike’s own, made by the routerNeverEasy build: yes, phone to one controller at a time
Needs data or a plan?NoYes, which is why nothing here uses itNo

Before you leave

Set it up at home

Do all of this on the kitchen table with every light on its real battery. The playa is where you ride it, not where you configure it.

Easy build, about an hour

  1. 1
    Power each controller from its real pack and confirm its strip lights.
  2. 2
    In the BanlanX app, connect over Bluetooth to each controller in turn. Set the chip type (WS2811), the color order until red is red, the LED count, and the name: Bike1 Frame, Bike1 Front, Bike1 Rear.
  3. 3
    Bind zones. The card in the box has the exact keypress; the shape is: power the controller on, and within 20 seconds hold the zone key on the RB3 until the strip blinks. Frame to 1, front to 2, rear to 3. Repeat with the second remote for the second bike.
  4. 4
    Turn Bluetooth off on your phone and run the whole bike from the remote: each zone, then ALL.
  5. 5
    Pick three or four modes you like and write down their numbers on tape inside the frame bag.
  6. 6
    Lock the Nilight whip remote to its whip. Charge everything.

Advanced build, an evening

  1. 1
    Power each board from its real pack. Join its setup WiFi (WLED-AP, password wled1234), open 4.3.2.1, and read the firmware version under Info. Anything below 0.14 gets updated now (Config → Security & Updates → Manual OTA, with the GLEDOPTO ESP32 build). This is the one step that needs the internet.
  2. 2
    Set up the router once: name the network Bike1Net, set a password, and pin it to WiFi channel 1. Channel 1 is not optional: the radio remote only talks on channel 1, and a board that joins a network on another channel stops hearing it.
  3. 3
    On each board: Config → WiFi, join Bike1Net. Name the board (Bike1 Frame, Bike1 Front, Bike1 Rear) and give its own access point a password too, so the board is reachable even if the router is off.
  4. 4
    Config → LED preferences. Frame: WS2811, two outputs (GPIO16, GPIO4), 40 LEDs each (a 2.5 m strip has a chip every 62.5 mm). Wheel: one output, about 36 LEDs per strip, both strips in parallel so it is still one output. Set the color order until red is red. Set the maximum current to what the pack can give, so a full-white scene dims instead of browning out.
  5. 5
    Build scenes 1 to 4 on the frame board: effect, palette, speed, brightness, saved as presets 1 to 4. Config → Security & Updates → Backup presets, then Restore the same file onto the other boards, so every light on both bikes carries the same four scenes.
  6. 6
    Pair the remote: Config → WiFi Setup → Wireless Remote, enable ESP-NOW, press any key on the remote, click the plus next to Last Seen, save. Once per board, three boards per bike, one remote per bike.
  7. 7
    Optional: put the three boards of a bike in one sync group (Config → Sync Interfaces) so a change on one follows to the others, and turn it off on the boards you want independent.
  8. 8
    Phone data off, laptop closed: join Bike1Net, open the WLED app, see all three boards, change each. Then press S1 to S4 on the remote and watch all three follow. Then do it again with the router off and confirm the remote still works. Charge everything.

Every day at camp

Charging

Everything charges from a wall cube with the same DC5521 plug. The wheel packs charge on the bike; nothing comes off.
PackPlugChargerFrom emptyWhere
TalentCell 142 Wh (frame, whip)DC5521 socket on the packThe cube in its boxMost of a dayIn the frame bag; run the cable in through the zip
Qwenoer 10 Ah (each wheel)DC5521 socket on a short leadThe 12.6 V 2 A cube in its boxAbout 5 hoursOn the wheel. Pull the silicone cap, plug in, cap it after
Radio remotesTwo AAA eachCarry the spare AAAs
Pocket routerMicro-USBRuns off the TalentCell USB portCharges with the TalentCell
Phone, laptopUSBYour ownSame strip
Both builds
What it is
A three-sided strip with twelve outlets spaced for bulky plugs, 5 ft flat-plug cord, wall-mountable.
What it does here
The charging station at camp, one per bike. Every charger here is a wall cube, and cubes on a normal strip block the outlet next to them.
How it connects
Into camp power, beside where the bike parks.
Why this one
Wide spacing on three faces means a frame charger, two wheel chargers, a phone and a laptop all fit on one.
Both builds
What it is
Eight alkaline AAA cells in a pack. Any brand works; these are cheap and ship with Prime.
What it does here
Two in each radio remote, the rest as spares.
How it connects
Slide the remote back off, two in, back on.
Why this one
The remotes ship without batteries, and a dead remote in the dark is a phone job you did not want.

The silicone caps for the wheel charging sockets are in the wheel parts above; every socket gets one.

The daily order of play

  1. 1
    Bike parks beside its power strip. Frame bag open, TalentCell cable in.
  2. 2
    Both wheel caps off, both wheel chargers in. Chargers hang from the spokes on their own cables; zip-tie a loop to the rack if they swing.
  3. 3
    Phone and laptop on the same strip.
  4. 4
    Before dusk: chargers out, caps in, bag zipped, a press of ALL or S1 to confirm every light wakes.

Orders

Shopping lists

Three lists: one bike on each build, and the whip. Two bikes is the bike list twice. Every line links to the exact product; prices are Amazon US on 2026-08-22 and will drift.

One bike, easy build

Frame and both wheels, both faces. SP630E on every light, one RB3 zone remote.

QtyPartEachLine
1TalentCell PB120B1, 12 V 142 WhPowers a whole frame for the night, or a whip. Its USB port also powers the pocket router on the advanced build.$96.99$96.99
1SIM&NAT DC5521 male pigtails, 5-packBridges a battery that ends in a socket to anything that takes bare wire: the frame controller on either build, and the whip rocker switch.$6.99$6.99
1BTF-LIGHTING IP66 FCOB WS2811 strip, 576 LED/m, 16.4 ft, 12 VThe outline of the frame. One reel per bike, cut in half: one length down the left side, one down the right.$32.99$32.99
1FCOB 3-pin 10 mm connector kitTurns a straight roll into a frame outline. Corners go round tubes, jumpers hop over the e-bike battery, strip-to-wire leads reach the controller.$14.99$14.99
2Qwenoer 12 V 10 Ah battery, bare leads + 2 A chargerPowers one wheel, both faces, for a night of color: about 10 hours of blue or green, 3.5 of white.$39.99$79.98
2BTF-LIGHTING FCOB WS2811 strip, 576 LED/m, DC12V IP30, 16.4 ftThe ring of light on each face of each rim. One reel per wheel.$25.99$51.98
23M VHB 4905 clear, 0.39 in x 16.5 ftThe bond between rim and strip.$9.99$19.98
1Gorilla Crystal Clear tape, 1.88 in x 18 ydThe seatbelt over each rim strip: it traps the strip under a band stuck to bare rim on both sides, and seals the unjacketed strip against dust.$9.98$9.98
1TICONN solder-seal wire connectors, 150 packEvery joint on the wheels: controller to strip, and the three-way splits where one output feeds both faces of the rim.$9.99$9.99
1Fermerry 22 AWG silicone wire, 6 colors x 10 ftThe short runs on each wheel: controller to each face of the rim, and the hop through the spokes from one face to the other. Red for V+, black for GND, white for data.$12.29$12.29
1Silicone DC port dust caps, 50 packCap the charging socket on each wheel battery whenever a charger is not in it.$9.99$9.99
112-outlet wide-spaced surge power strip, 3-sidedThe charging station at camp, one per bike. Every charger here is a wall cube, and cubes on a normal strip block the outlet next to them.$12.99$12.99
1Amazon Basics AAA batteries, 8 packTwo in each radio remote, the rest as spares.$6.79$6.79
1SP630E controller + RB3 zone remote, kitOn the easy build the kit controller runs the frame and the remote runs the whole bike: pick a zone, change it, or ALL.$23.99$23.99
2SP630E controller, bareOne per wheel on the easy build. Binds to that bike RB3 remote as zone 2 (front) or zone 3 (rear).$16.99$33.98
Total$423.90

One bike, advanced build

Frame and both wheels, both faces. WLED on every light, one pocket router, one radio remote.

QtyPartEachLine
1TalentCell PB120B1, 12 V 142 WhPowers a whole frame for the night, or a whip. Its USB port also powers the pocket router on the advanced build.$96.99$96.99
1SIM&NAT DC5521 male pigtails, 5-packBridges a battery that ends in a socket to anything that takes bare wire: the frame controller on either build, and the whip rocker switch.$6.99$6.99
1BTF-LIGHTING IP66 FCOB WS2811 strip, 576 LED/m, 16.4 ft, 12 VThe outline of the frame. One reel per bike, cut in half: one length down the left side, one down the right.$32.99$32.99
1FCOB 3-pin 10 mm connector kitTurns a straight roll into a frame outline. Corners go round tubes, jumpers hop over the e-bike battery, strip-to-wire leads reach the controller.$14.99$14.99
2Qwenoer 12 V 10 Ah battery, bare leads + 2 A chargerPowers one wheel, both faces, for a night of color: about 10 hours of blue or green, 3.5 of white.$39.99$79.98
2BTF-LIGHTING FCOB WS2811 strip, 576 LED/m, DC12V IP30, 16.4 ftThe ring of light on each face of each rim. One reel per wheel.$25.99$51.98
23M VHB 4905 clear, 0.39 in x 16.5 ftThe bond between rim and strip.$9.99$19.98
1Gorilla Crystal Clear tape, 1.88 in x 18 ydThe seatbelt over each rim strip: it traps the strip under a band stuck to bare rim on both sides, and seals the unjacketed strip against dust.$9.98$9.98
1TICONN solder-seal wire connectors, 150 packEvery joint on the wheels: controller to strip, and the three-way splits where one output feeds both faces of the rim.$9.99$9.99
1Fermerry 22 AWG silicone wire, 6 colors x 10 ftThe short runs on each wheel: controller to each face of the rim, and the hop through the spokes from one face to the other. Red for V+, black for GND, white for data.$12.29$12.29
1Silicone DC port dust caps, 50 packCap the charging socket on each wheel battery whenever a charger is not in it.$9.99$9.99
112-outlet wide-spaced surge power strip, 3-sidedThe charging station at camp, one per bike. Every charger here is a wall cube, and cubes on a normal strip block the outlet next to them.$12.99$12.99
1Amazon Basics AAA batteries, 8 packTwo in each radio remote, the rest as spares.$6.79$6.79
1GLEDOPTO GL-C-017WL-D 4-channel WLED controllerThe frame brain on the advanced build. Two outputs drive the two sides; two stay spare.$26.99$26.99
2GLEDOPTO ESP32 Mini WLED controllerOne per wheel on the advanced build, riding the hub beside the battery. Runs both faces of that wheel from its one output.$21.99$43.98
1GLEDOPTO WLED radio remote, GL-RC-001WLOne per bike. S1 to S4 put the whole bike into scene 1 to 4 from the saddle, gloves on, no phone.$16.99$16.99
1GL.iNet Mango GL-MT300N-V2 pocket routerMakes the bike its own WiFi network, so the WLED app on your phone sees every controller on that bike at once.$29.99$29.99
Total$483.88

Whip add-on, either build

The whip, its mount, and its own battery. The pigtail comes from the frame 5-pack.

QtyPartEachLine
1Nilight 3 ft spiral RGB whipThe tall light that makes you visible across the playa. Twelve solid colors and dozens of chasing patterns from its own remote.$46.94$46.94
1KEMIMOTO ATV handlebar whip mountHolds the whip base to the bike. The whip drops into the hole and locks.$19.99$19.99
1TalentCell PB120B1, 12 V 142 WhPowers a whole frame for the night, or a whip. Its USB port also powers the pocket router on the advanced build.$96.99$96.99
Total$163.92

From a hardware store or the garage

  • An old inner tube, cut open, to wrap the wheel packs
  • UV-rated zip ties, 8 in and 14 in, a bag of each
  • Isopropyl alcohol and a rag
  • Blue threadlocker for the whip mount
  • A lighter or small heat gun for the solder-seal joints
  • Scissors, a straightedge and a sharp blade for the tape ribbons
  • Masking tape for the dry fit
  • A small dry bag or frame bag per battery, if the bike does not have one
  • A label maker or tape and a marker: every cube, cable and controller gets a name

Learned the hard way

Things that bite

Each of these cost us a day or a part. Read them before the parts arrive.

Wheels are islands

Nothing crosses an axle, not a wire and not a slip ring. Battery, controller and strips spin together.

Never parallel two packs

Two packs feeding one load fight each other through their BMS boards. One pack per light.

Cut on the mark

Addressable strip cuts only at the printed marks, every 62.5 mm. Anywhere else kills that segment.

Data has a direction

Each strip has an arrow. Feed DATA in at the tail. A strip fed from the wrong end is a dead strip.

Channel 1

Advanced build: the radio remote only hears channel 1. A board joining camp WiFi on another channel goes deaf to it. Keep the boards on the bike router and the bike router on channel 1.

Never join camp WiFi

The boards stay on their own bike network, period. A board on camp WiFi is reachable by everyone on it and lost to the remote.

Tape, not velcro, on the rim

A strip bent flat around a rim is always trying to straighten. Velcro peels. VHB plus a clear band holds.

Heat is the enemy of adhesive

Clean with isopropyl, press hard, and band every end. A bond that looks fine at 7 pm lets go at 2 pm.

Use the cube that came with the pack

Packs accept 1 A or 2 A; a 2 A cube on a 1 A pack is how a BMS dies. Label the cubes.

Rotor clearance

Check the whole revolution with the bike lifted. The caliper does not move; the zip tie tail does.

One-to-one the whip remote

Pair it at home or the next whip over changes your color every time they change theirs.

Spare AAAs

The remotes ship empty. A dead remote at night turns a glove job into a phone job.

Honesty

What we have not verified

Things on this page that come from listings, manuals and arithmetic rather than from our hands. They will move to the build sections once the parts are on the bikes.
  • Which WLED version GLEDOPTO ships on the boards today. The remote needs 0.14 or newer; check Info before anything else.
  • Whether the Nilight whip LEDs speak WS2811. The whip-on-the-frame-board experiment depends on it.
  • The KEMIMOTO mount fits a 22.2 to 28.6 mm tube. Measure yours; rear racks vary.
  • Runtime figures are watts-per-meter from the strip listing divided into the pack rating. Real packs give 80 to 90 percent of the label.
  • The RB3 binding keypress, which we describe by shape. The card in the box is authoritative.
  • The exact LED count WLED wants for a 2.3 m wheel strip. Set it to the chip count and adjust until the last segment lights.

Built for two fat-tire e-bikes headed to Black Rock City, August 2026. The whip, frame and wheel parts named here are what we are riding. If you build one, the things you learn belong on this page: Stokd.

Visibility

Being seen from across the playa

Wheels and a frame make you visible to the rider beside you. The whip is what your camp sees from three blocks off, and what you steer toward when you are the one riding back at four in the morning.

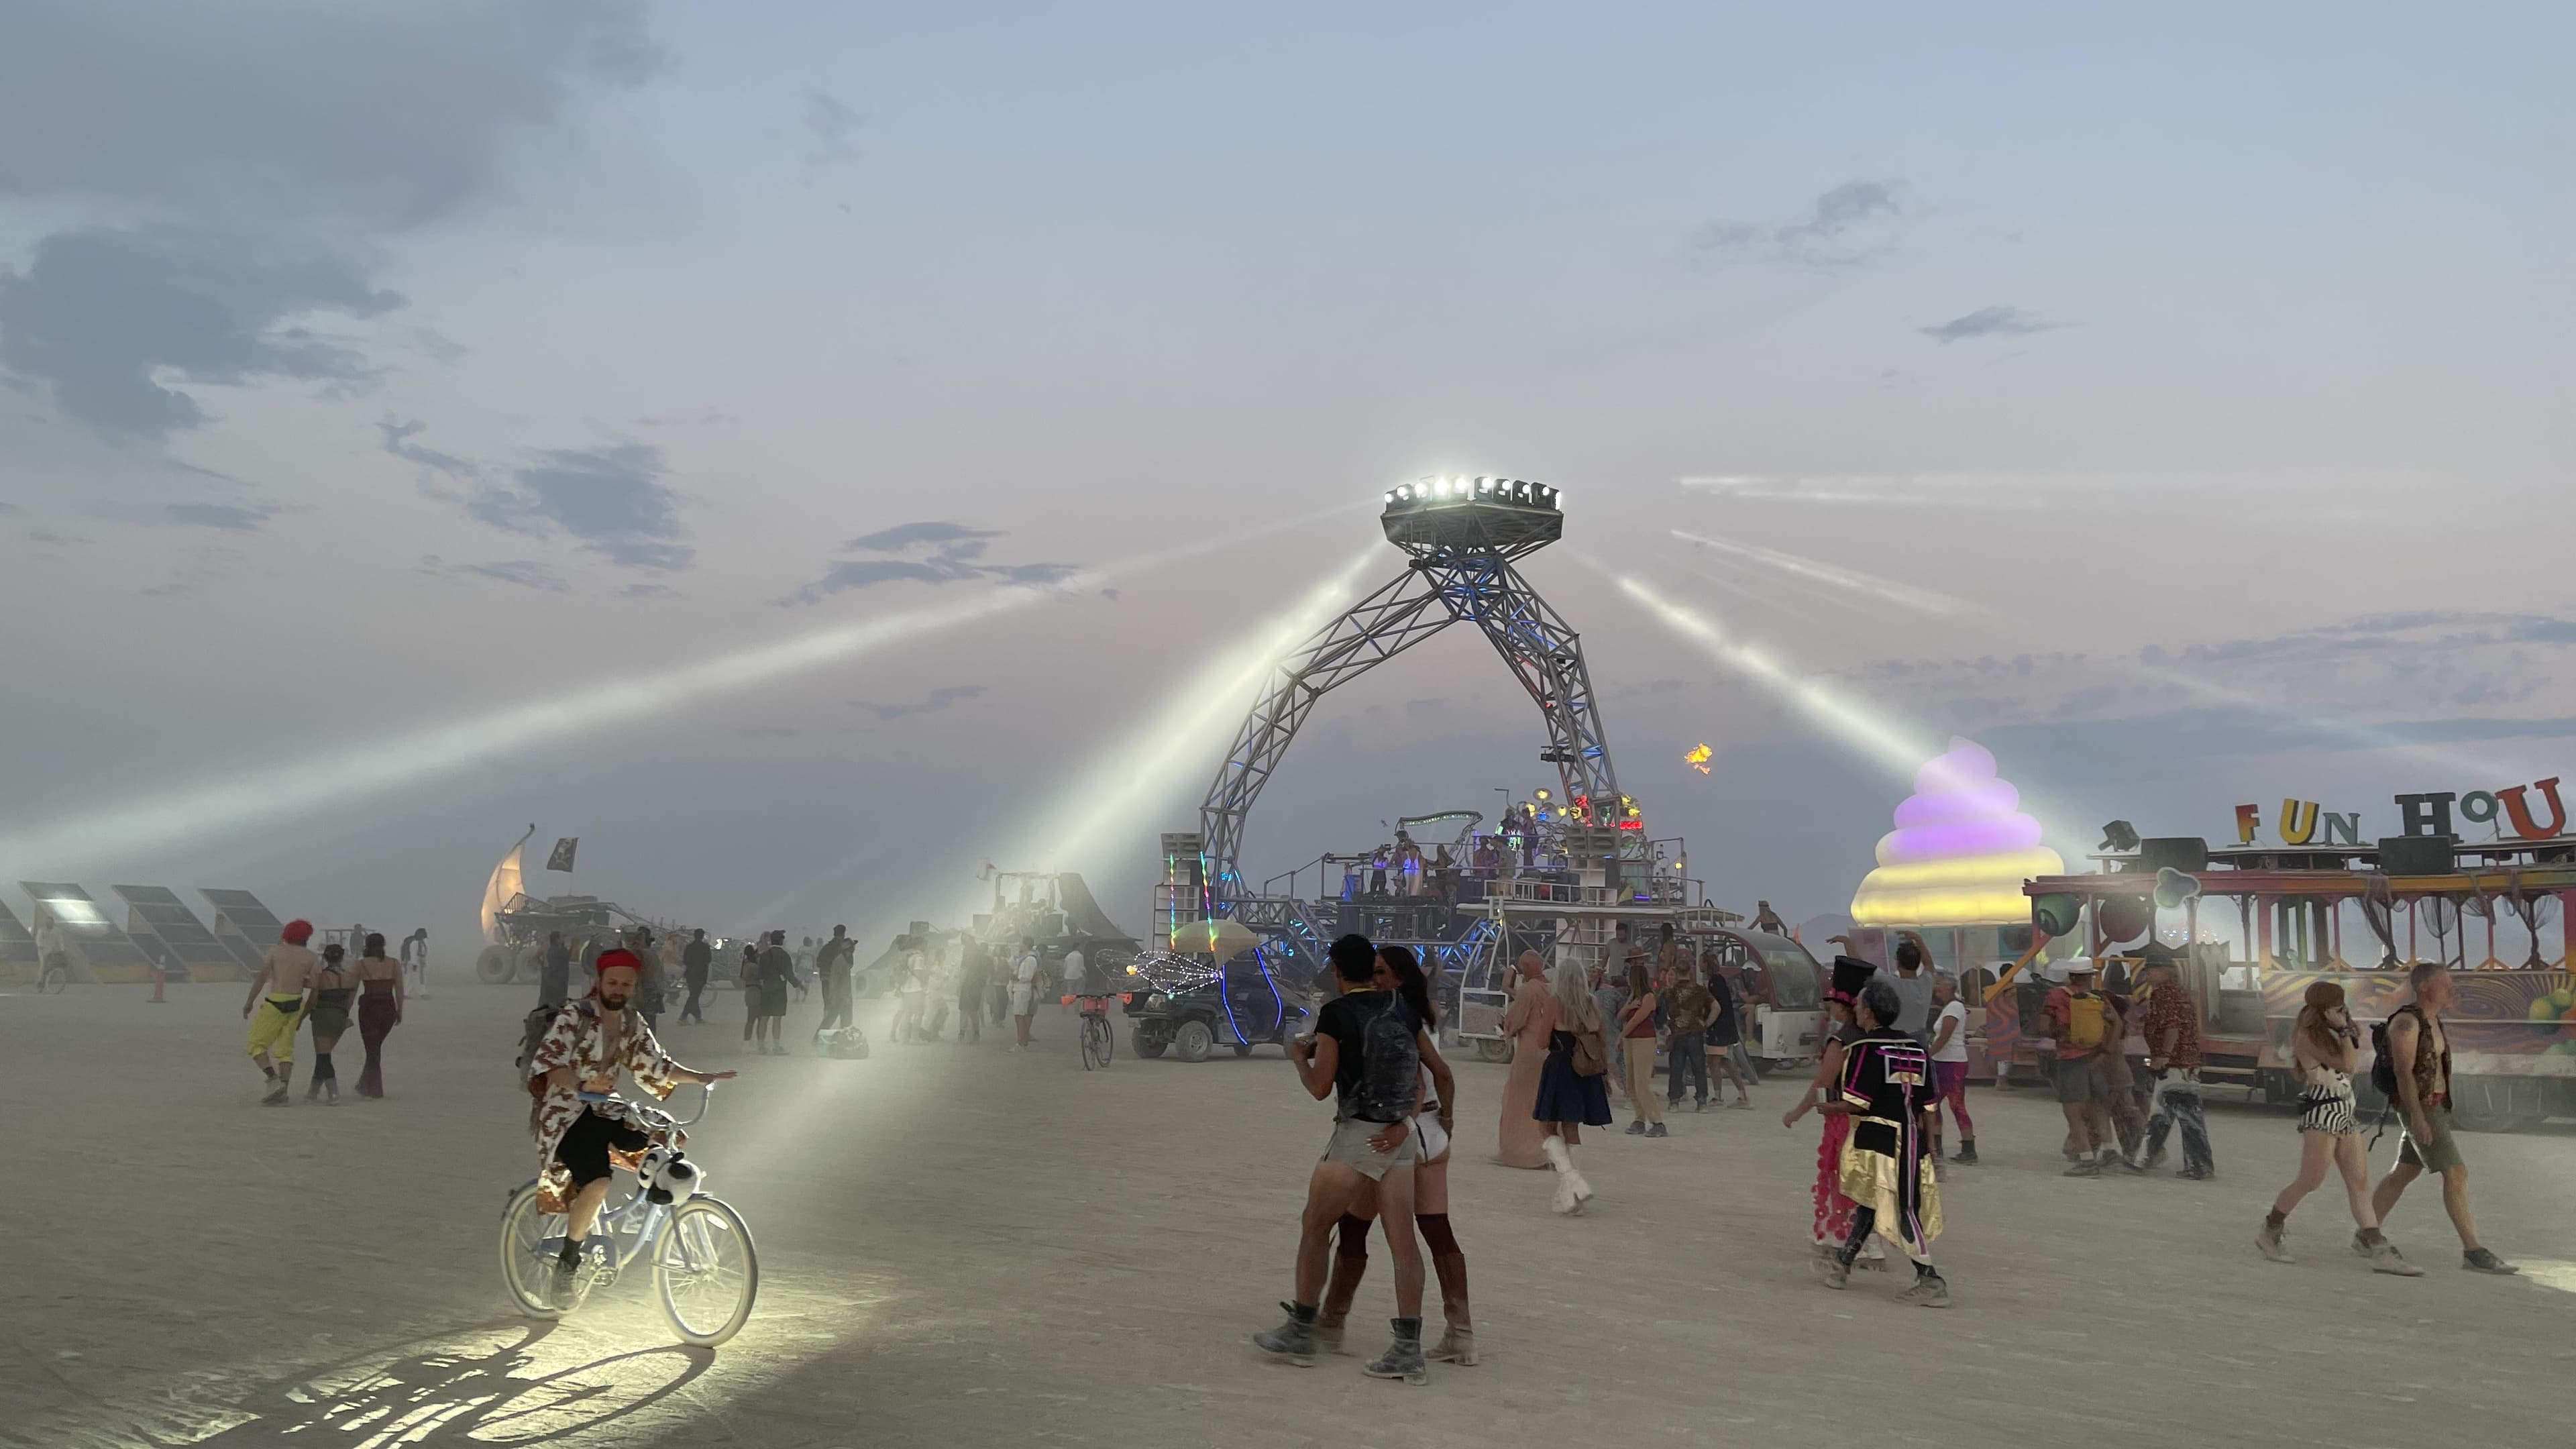
A rider on a lit bike throws a beam of light across the dust at dusk while everyone else fades to a gray shape.
Dusk, deep playa. One rider with a beam, everyone else a gray shape. This frame was shot where you will be standing.

At home

Before you leave

Every line here is something you can get wrong at home and cannot fix once you are out there.

Elsewhere

Still need the gear

A lit bike still needs to get on the car and stay charged once it's there.

Browse transportation gear